
Connecting Rootr to Claude and ChatGPT in your browser
No installs, no terminal — a start-to-finish, screenshot-by-screenshot walkthrough for connecting Rootr to the web versions of Claude.ai and ChatGPT.
Last updated: 2026-07-16
Once connected, asking Claude or ChatGPT "what documents are in my workspace?" will answer with the real document list from Rootr. Check what you need first.
- A Rootr account (sign up free at rootr.io if you do not have one).
- A Claude.ai account or a ChatGPT account — you only need the one you actually use.
- The Rootr workspace you want to connect — this decides which documents the AI can see.
① Connecting Claude.ai (in your browser)
Start while logged in to claude.ai. Follow these clicks in order.
- Click your name/icon (bottom-left or top-right) to open Settings.
- In Settings, click the Connectors menu.
- Near the bottom of the screen, click "Add custom connector."
- For the name, type anything you like (for example, "Rootr").
- In the URL field, paste this address exactly:
- Click Add. A Rootr login screen opens (in a new window or the same one) — log in with your Rootr account.
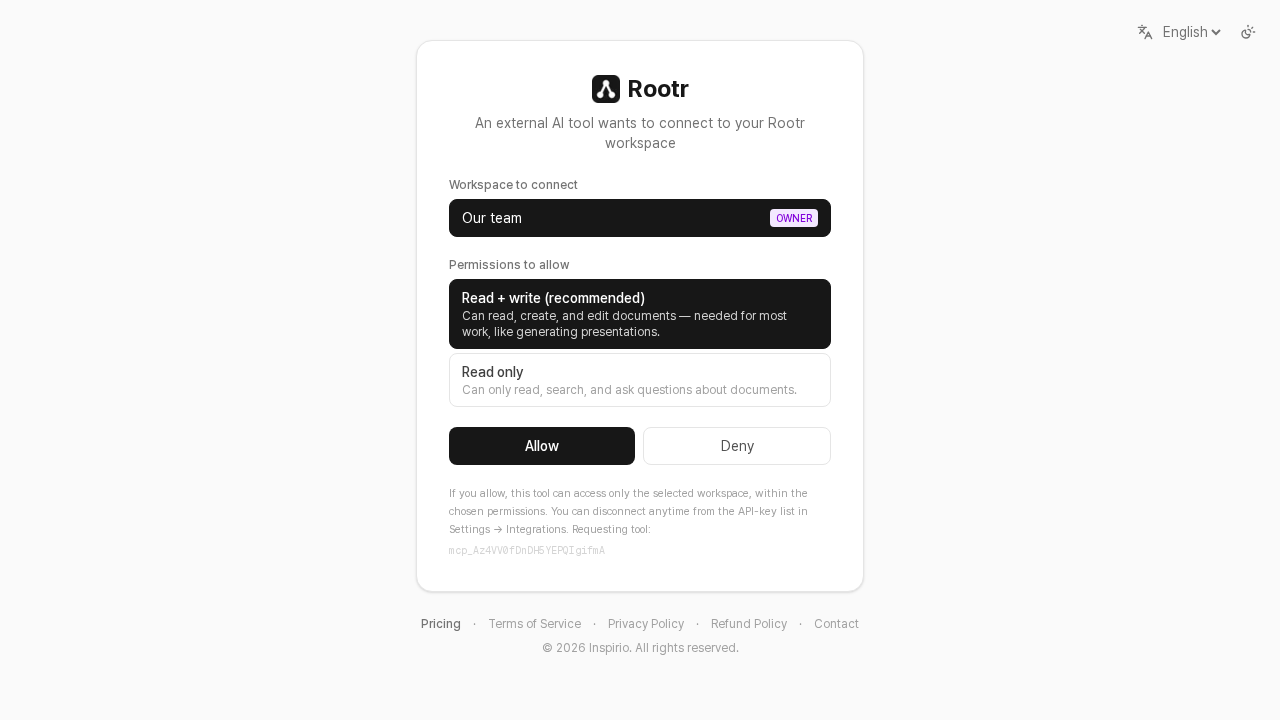
- Pick the workspace to connect and a permission level — read-only, or read + write (lets it create/edit documents) — then click Allow.
- You land back on the Claude screen automatically. If Rootr shows as "Connected" in the connector list, you are done.
Now open a new chat and ask "what documents are in my Rootr workspace?" If you get back real document names from Rootr, the connection worked.
② Connecting ChatGPT (in your browser)
Start while logged in to chatgpt.com. Connectors are only available on paid plans (Plus and above).
- Click your name (bottom-left) to open Settings.
- Go into the Connectors menu.
- Under Advanced settings, turn on Developer mode — this is required if you want ChatGPT to also create/edit documents in Rootr (OpenAI policy).
- Back on the connector list, click "Create" or "Add custom connector."
- Give it a name (for example, "Rootr") and paste this address into the MCP server URL field:
- Leave the authentication method as OAuth, check any confirmation such as "I trust this application" if shown, then click Create.
- When the Rootr login screen appears, log in, pick a workspace and permission level, then click Allow.
- Back in ChatGPT, you can turn Rootr on from the tools/connector menu (the "+" icon) in a new chat.
Open the tools menu in the chat box, turn Rootr on, then ask "what documents are in my Rootr workspace?" Real document names back means you are connected.
Common snags
| Symptom | Cause · fix |
|---|---|
| No "Add custom connector" button in the connector list | Some Claude plans/org settings disable custom connectors. Ask your workspace admin. |
| ChatGPT has no Connectors menu at all | You're on the free plan — connectors need Plus or above. |
| Connected, but it can't create or edit documents | ChatGPT needs Developer mode on for write access to work. For Claude, check the permission you picked when adding the connector — read-only means no writes. |
| Login screen keeps rejecting me | Usually the Rootr account email doesn't match the account you're actually logged into. Retry with the correct Rootr account. |